Take a journey from pixels to stitches with embroidery digitizing—the perfect way to turn digital art into stunning embroidered designs.
With each pixel of your design becoming a stitch, digitizing services for embroidery help in this remarkable transformation. While it may sound like magic, digitizing is a blend of art and science, requiring specific tools, skills, and techniques to bring each design to life.
Let's start knowing the digitizing process, step-by-step.
From Screen to Stitch: The Digitizing Process
The process of digitizing begins by preparing your image. Some designs work better than others, especially those with clear lines and fewer colors.
Complex images when simplified make them clear for embroidery.
-
Choosing the Right Stitch Types
The three main types include:
| Stitch Type |
Description |
|---|---|
|
Running Stitch |
A simple, continuous stitch used for outlines or fine details. |
|
Satin Stitch |
This zigzag stitch adds shine and is great for text or larger outlines. |
|
Fill Stitch |
Used for filling in larger areas, it creates a textured, solid surface. |
Each type brings its own texture and effect to the embroidery, making stitch choice essential for capturing the essence of the original artwork.
-
Adjusting Density and Pull Compensation
Stitch density impacts how thick or thin the embroidery appears, while pull compensation prevents distortion by adjusting stitches based on how fabric might shift under the needle. By carefully balancing these factors, digitizers ensure that designs look polished and stay true to the original image even on stretchy or shifting fabrics.
-
Setting Stitch Direction and Sequence
Stitch Direction: Sets the path of the needle, shaping the overall look of the fabric.
Stitch Sequence: Defines the order each part is stitched, avoiding gaps and misalignments.
Impact: Careful planning ensures a smooth, seamless design that's stitched together perfectly.
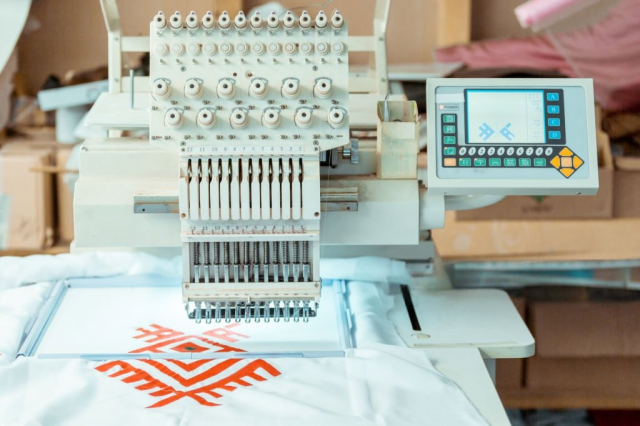
Essential Tools for Embroidery Digitizing
Few essential tools are needed for this purpose:
- Embroidery Machine: The backbone of embroidery creation — an embroidery machine reads digitized files and stitches the design onto fabric. Testing your designs on a machine helps refine the final result.
- Digitizing Software: This software is the core tool for creating embroidery files, allowing you to experiment with stitch types, density, and direction. Quality software provides control over each design element and can support convenient features like raster to vector conversion.
- Pen Tablet (Optional): A pen tablet is a great tool to level up your digitizing game. It gives you more control and makes the whole process smoother.
Unlock Your Embroidery Potential
Once you have the tools, consider these key techniques to master digitizing:
- Underlay Stitches: These foundational stitches stabilize the fabric, providing a strong base for the design and helping keep stitches aligned.
- Push and Pull Compensation: Adjustments made to keep the fabric from distorting. These settings vary by fabric type, which is why practicing on different materials is essential.
- Stitch Density Control: Adjusting the density helps you control the look and feel of each stitch, which is particularly useful when working on designs with various textures.
Starting Small, Learning Big
A great way to get comfortable with digitizing is by starting small. Working on simple projects allows you to practice without getting overwhelmed by complex designs. Online courses and tutorials also offer an abundance of guidance for beginners, helping you pick up tips and tricks from experienced digitizers.
Challenges You May Face in Embroidery Digitizing
While the digitizing process is accessible, there are challenges involved:
- Design Complexity: Some images may need simplification to translate well into embroidery. Small details, like intricate facial features, may be challenging to capture in tiny designs.
- Fabric Variability: Different fabrics respond differently to stitching. For instance, stretchy fabrics may shift under the needle, so adjusting tension and density settings is crucial.
- Software Limitations: Every digitizing software has specific functions and restrictions. Getting to know your software's features helps you optimize designs effectively.
- Trial and Error: Testing designs on fabric is often necessary, as unexpected issues can arise. Testing allows for adjustments and ensures the design's quality.
Traditional Embroidery vs. Digitizing Embroidery
|
Feature |
Traditional Embroidery |
Digitizing Embroidery |
|---|---|---|
|
Process |
Manual, hand-stitched |
Digital design, machine-stitched |
|
Skill Requirement |
High level of skill and precision |
Basic design skills and software knowledge |
|
Time Consumption |
Time-consuming, especially for intricate designs |
Relatively faster, especially for large-scale projects |
|
Design Flexibility |
Limited design complexity |
High degree of design complexity and customization |
|
Production Cost |
Higher due to labor-intensive process |
Lower due to automation and efficiency |
|
Consistency |
Less consistent, variations in stitches and tension |
High consistency, uniform stitches and tension |
|
Production Volume |
Lower production volume |
Higher production volume, ideal for mass production |
Advanced Embroidery Options
Tired of flat designs? Let's add some oomph! 3D embroidery is the secret ingredient to elevate your creations. Watch as your stitches come to life, adding depth and texture that'll wow your audience.
Conclusion
Remember the days of hand-stitching everything? Well, those days are gone!
With embroidery digitizing, you can still create beautiful, one-of-a-kind pieces but without all the backache. So, embrace the future of embroidery and let your creativity run wild.


